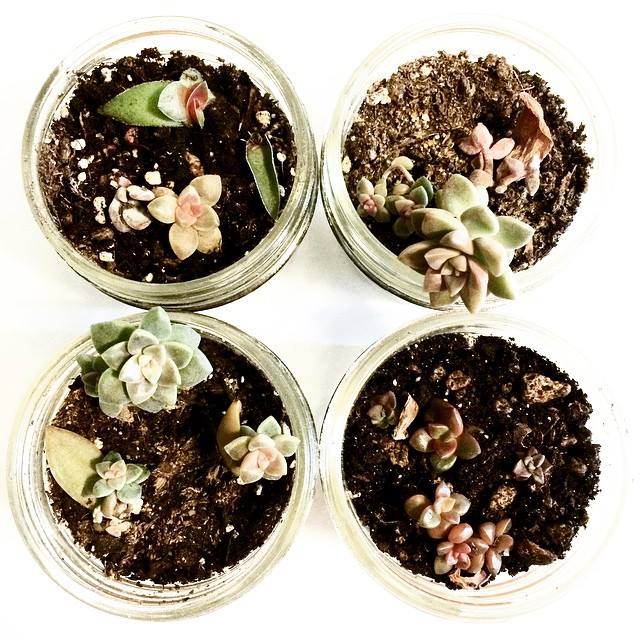
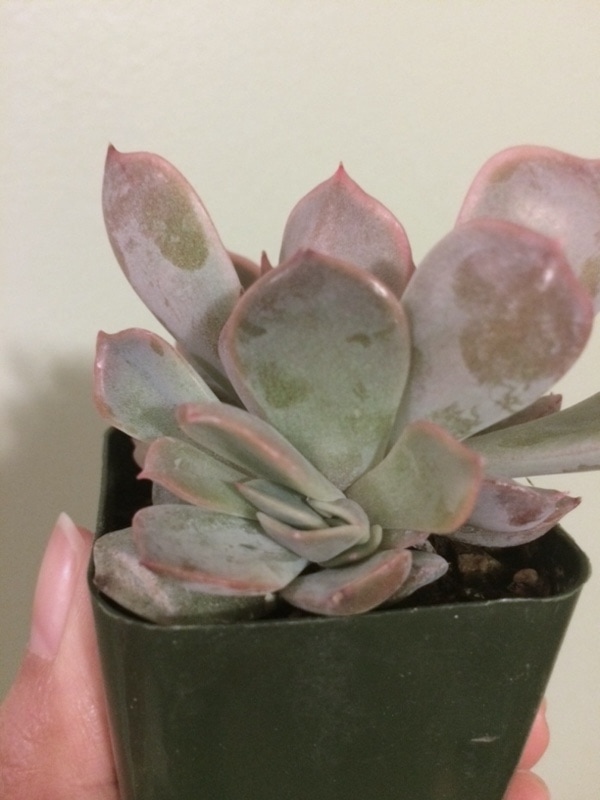
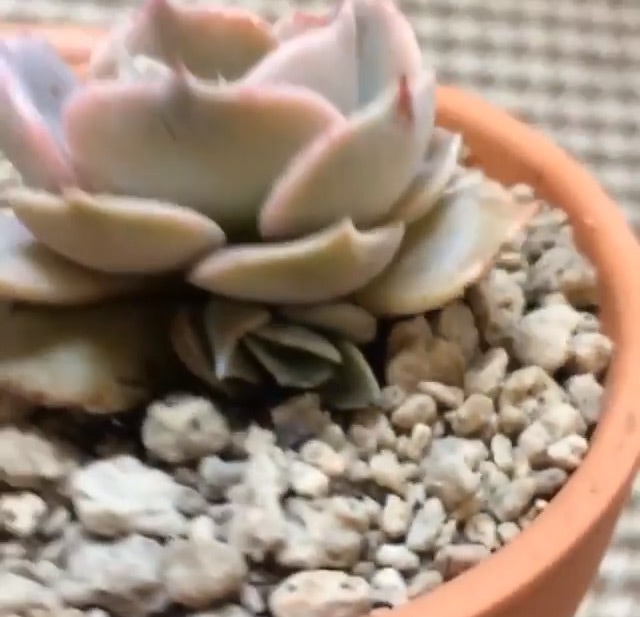
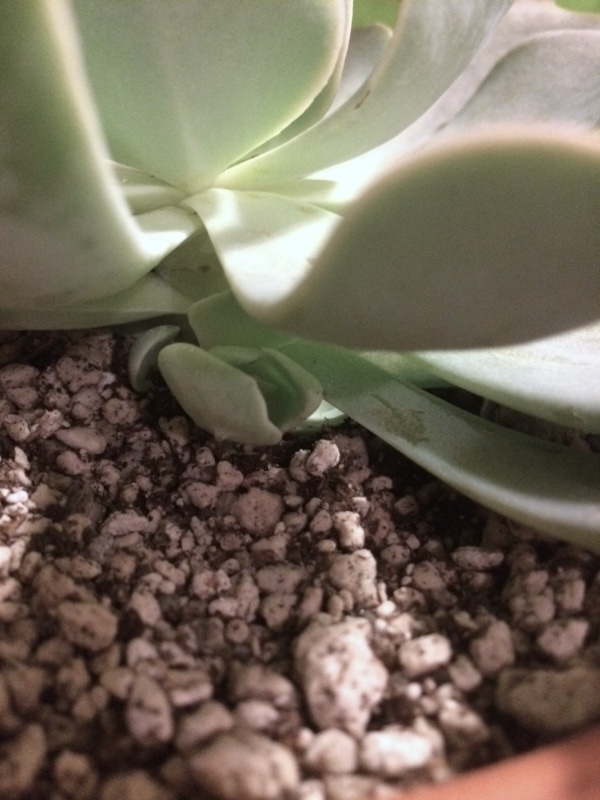
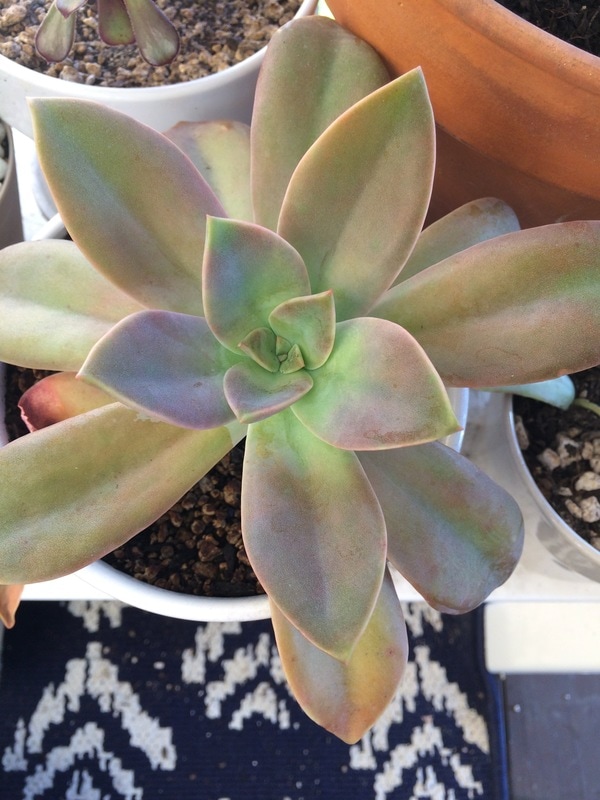
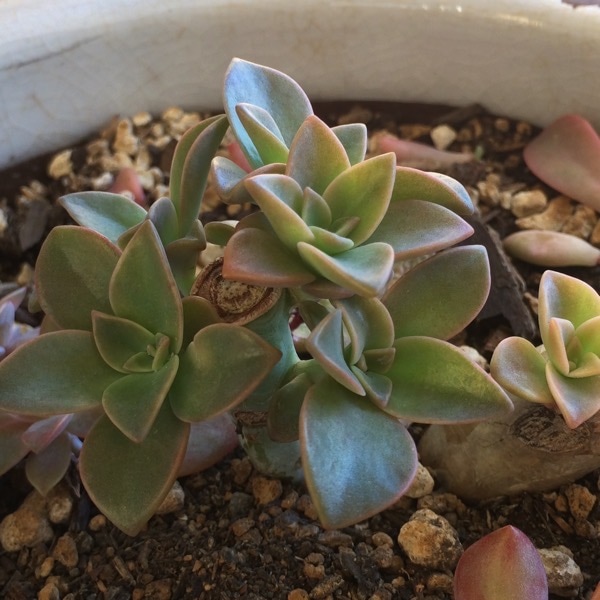
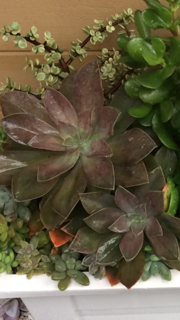
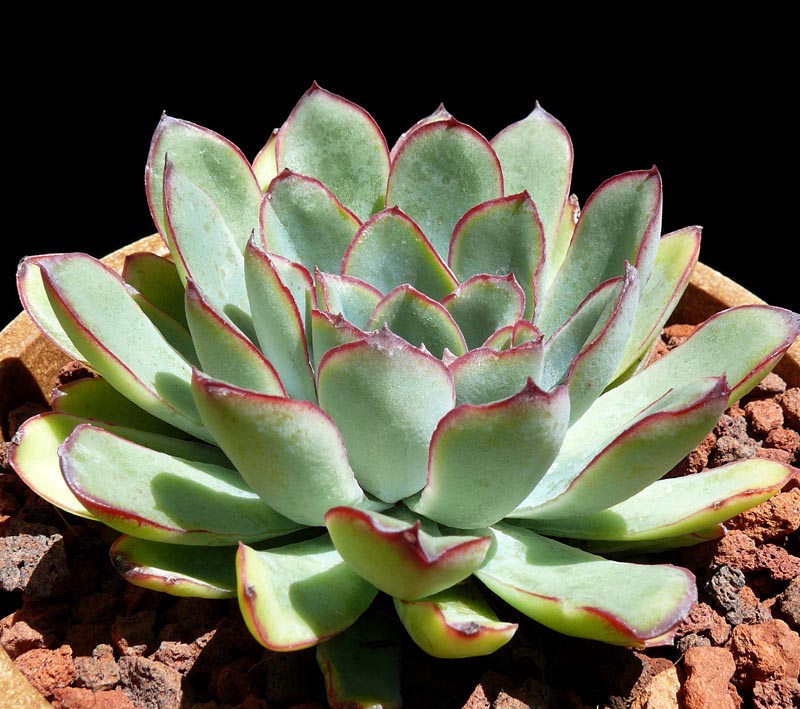
 succulent pups from leaves | March 2015 prop·a·ga·tion /ˌpräpəˈɡāSH(ə)n/ Propagation is derived from the root word propagate which means "to cause to multiply." What I love most about succulents is their ability to multiply in various ways. I'm also drawn to their ability survive in drought because they are designed to store water within their leaves and stems. In my previous post, I discussed two methods of succulent propagation: cuttings and beheading. Today, I'll share propagation techniques from leaves and offsets. leaves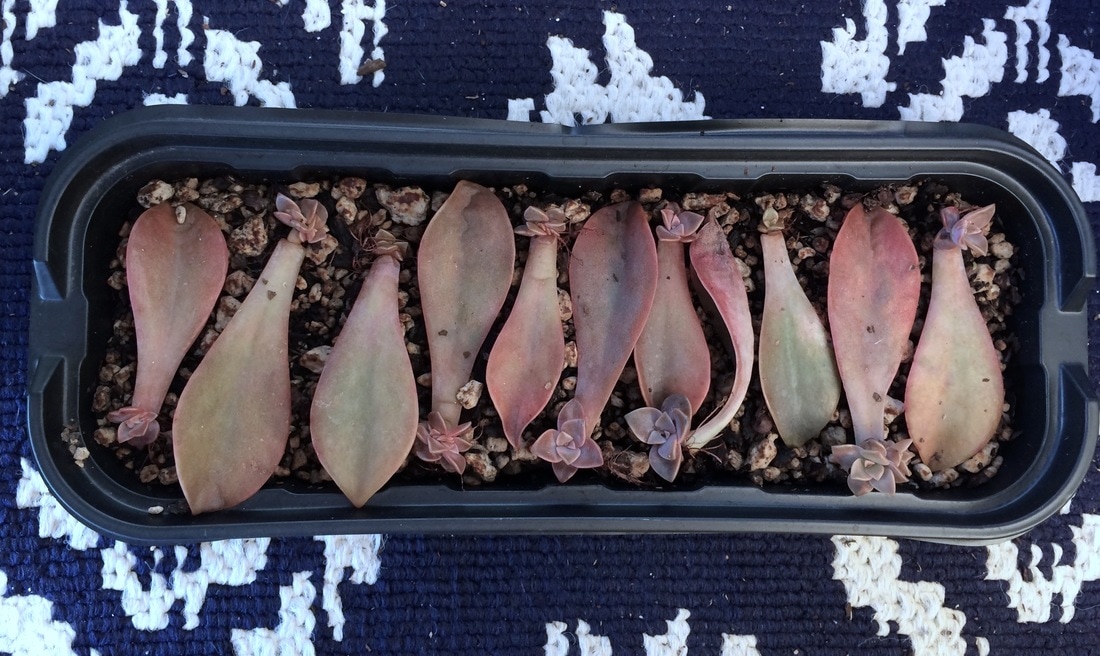 G. Fred Ives leaves sprouting new pups, November 2016 In my last post, I mentioned how my G. Fred Ives has given me at least 20 new plants. While beheading is my favorite approach to propagating, Fred Ives can easily multiply with leaf propagation as well. In October of 2016, I beheaded one of my Fred Ives plants and also pulled off some leaves for propagation. When removing leaves, it's important to remove the whole leaf cleanly. If any part of the leaf is still on the stem, the leaf will not propagate. I removed 11 leaves and placed them on top of soil as shown above. Within a month, the leaves sprouted new roots and babies! For the most part, the leaves can survive with minimal care because each leaf retains water and can provide a source for nutrients for the new pup. However, this past winter has been very wet and I kept an eye on these pups because this container did not have proper drainage. After each storm, I made sure to pour the water out of the container. After two weeks of rain, I ended up cutting holes in the corners of the container so that water would drain properly. As the pups grew bigger and established larger root systems, the leaves dried up and detached from the rosettes. I could have easily left the pups in the first container, though I wanted to consolidate them into another pot. I placed the larger four pups into a seedling tray and seven of the smaller pups in a 2-inch pot.  G. Fred Ives, February 2017 As spring approaches, I look forward to seeing these babies grow bigger. While I've tried propagating succulents from leaves, I have to say, it's the slowest way to propagate succulents. When the weather gets better, I'll share photos from my current propagation station to show the progress on other leaves that have been slow-growing this winter. offsets Echeveria Blue Bird, January 2017 I've probably had the least experience with propagating with offsets. Offsets are succulent pups or babies that set off from a mother plant. Some refer to Echeverias and Sempervivums as "hen and chicks" succulents, where there is a mother plant or "hen" that will hatch lil "chicks" or "pups" or succulent baby offspring. In the photo above, my Echeveria Blue Bird has a pup or "chick" peeking through. This particular plant actually has four pups. When a succulent has an offset, you can actually remove the pup and root it on its own. I have yet to try rooting any of these Echeveria pups because I'm not exactly sure if they are ready. I can certainly keep them together and have them grow as a E. Blue Bird family, though I know the pups can grow stronger if they are individual specimen plants. I can also give the pups away. I haven't decided yet. Typically, when you remove the pup, you should let the wound callous over for a couple of days before planting it in well-draining soil. Sometimes they will begin to grow roots while they are still attached or will fall off on their own. Like I said, this is the method I am least familiar with so I'll keep you posted on my E. Blue Bird journey. E. Orion pup | E. Lilacina pup | E. Misty Lilac pup, February 2017 Recently, I've added succulents with pups to my garden. Here are some of my new additions: E. Orion, E. Lilacina, and E. Misty Lilac. A volunteer at a local garden informed me that succulents with pups make great mother plants, which in the long term will produce many succulent offspring. I'm eager to test this theory because in the past two years, I've had 3 E. Black Princes and they have all died. Each E. Black Prince had a pup when he came home with me and I recently read that for E. Black Prince, offsets are rare. In the event of an offset, the mother plant will typically die off. I learned about this after mine had died and haven't had the courage to get a new E. Black Prince. If I do, I'll be sure to pick an aubergine beau without a pup.  Photo credit: San Marcos Growers
0 Comments
Quite some time ago, I was on a date with this fellow. It might have been our first or second date and he asked me what I liked to do for fun. I quickly responded, "I like to propagate succulents." I'm pretty sure he had no idea what I was talking about but long-story short, I like to believe that was the line that made me a keeper because now he is the number one enabler of my succulent hoarding. I started propagating succulents about five and a half years ago but did not get serious about it until 2014. Here is some photos from my early propagation days. 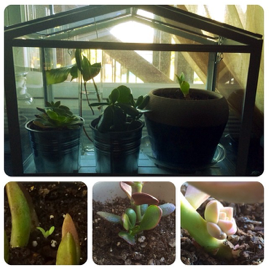 propagation station, 2014 When I first started propagating, I tried to multiply various plants. Here we have Pothos, Aeonium, Crassula, and Aloe varieties in a mini greenhouse sitting below a south facing window with filtered light. Right below are zoomed in shots of Graptosedums and Crassulas. I received the Aeonium and Aloe cuttings from neighbors and the Crassula from my mother. The Graptosedums I purchased at a local big box store. The Pothos cutting wasn't cut properly and never rooted so it died and withered away. (I tried Pothos again last year and was successful). When it comes to succulents, there are multiple approaches to propagation. You can propagate with a cutting, from a leaf, and offsets. There are also methods of beheading that I've found works for some. cuttings The Aeonium and Crassula in my mini greenhouse above are cuttings, or parts of plants that have been trimmed away. The Aloe is actually an offset from a mother plant, more on offsets soon. I recently received a handful of Crassula Ovata Variegata cuttings. I absolutely love variegated succulents and was thrilled to received these last week. Cuttings are actually beneficial for both the giver and receiver of these lovely plants. When you cut a succulent, it actually encourages new growth on the original plant and you're able to gift your trimmings to a friend or colleague. The mother plant will callous over and branch out where it was trimmed. The cuttings can be potted up after the wound has calloused over and will grow new roots. 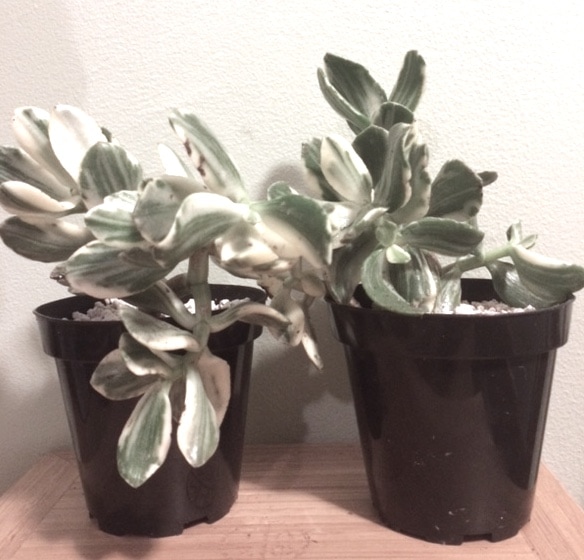 Crassula Ovata Variegata, February 2017 Here are my new cuttings potted up in well-draining soil in 3 inch, plastic pots. I've found that potting them in well-draining soil helps with establishing roots, but I also have a Crassula cutting outside on my balcony, that hasn't been potted that has already begun sprouting new leaves. I actually meant to throw the cutting out but left it there only to find new leaves on it yesterday. Succulents are pretty resilient and can continue to survive in the worst conditions because they store water in their leaves and stem. beheading Aeonium, February 2017 The Aeoniums in the mini greenhouse were about 2-3 inches wide when I first received the two cuttings. Since then, they have established a wonderful root system and grown tremendously. They are now almost 8 inches wide and 6 inches tall. About three months ago, I wanted to try beheading my Aeonium specimens. Sometimes, when succulents grow too tall, they look a bit leggy. Some succulent garden designers do not care for the leggy look, while others appreciate how the look reminds them of scenes from The Lorax. I tend to agree with the former. So off with his head! 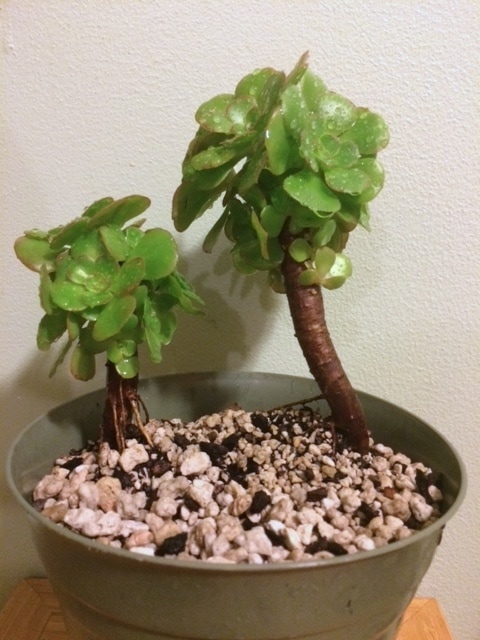 Aeonium Arboreum | new growth | February 2017 While I know these guys belong to the genus Aeonium, I'm not entirely sure their species. Some research has told me they are Aeonium Arboreum, but their bloom will help solidify my doubts. Though, I'm not in a rush to find out. Aeoniums are monocarpic, meaning these only bloom once. Once these guys bloom, they will die. The two stems above have sprouted at least a dozen new Aeonium rosettes each. After beheading each stem in November 2016, I potted them together and kept them underneath a table on my balcony. Aeoniums are winter growers so I figured beheading right before their growth season would be the best time to see new growth. The Aeonium heads also established new roots and are actually growing 3-4 pups, or new rosettes where old leaves have fallen off. I'll be gifting one of my Aeonium heads to one of my girlfriends who coincidently sent me a picture of Aeoniums she saw in a planter in some random place. Succulents are for sharing. Graptoveria Fred Ives | full grown pup, November 2016 | pups after beheading, November 2016 | mother plant, February 2017 I've also tried beheading my Graptoveria Fred Ives. The image on the left is a pup that is actually from the first time I beheaded the mother plant. It's about 6 inches diameter now and in my mother's garden in Southern California. The center photo includes the pups that grew after the second beheading. I have already removed those pups from the original stem and have gifted them to friends and family. The mother plant is on the right. I need to get a better picture of her. That photo is from earlier today and the rain does not do her justice.
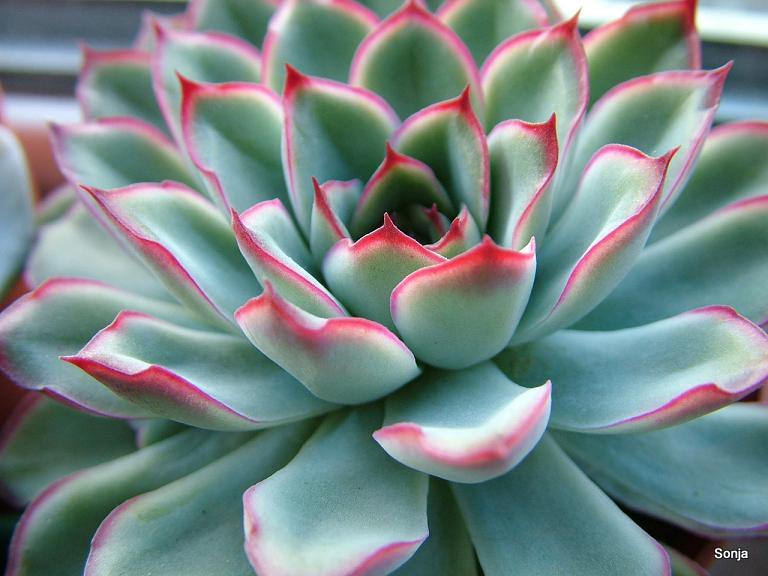
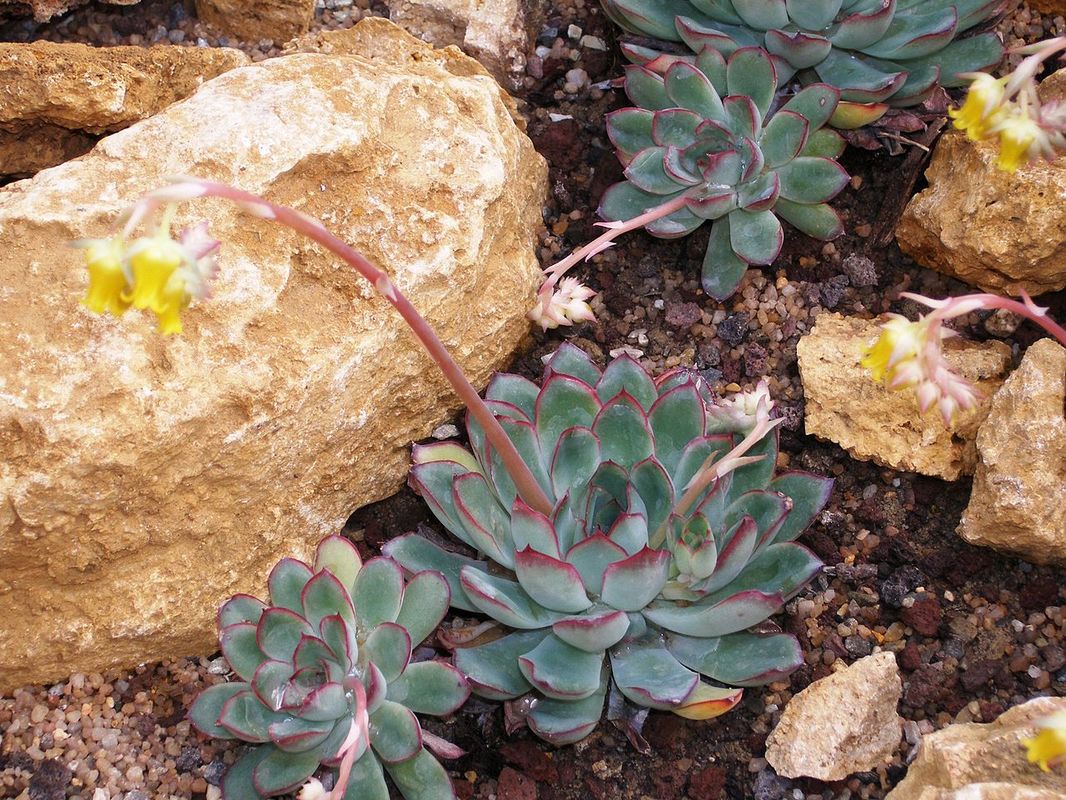
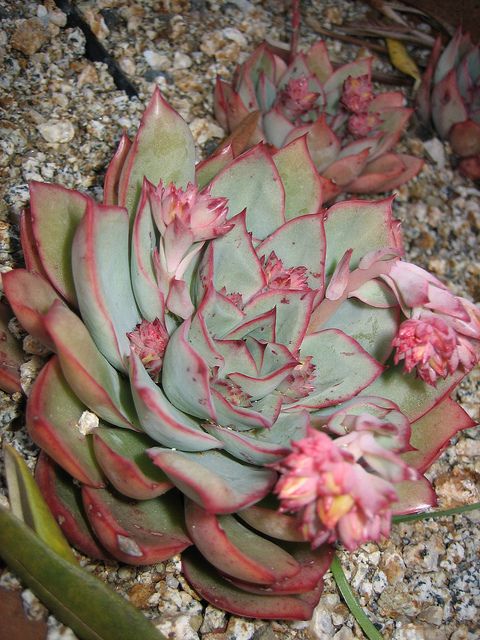
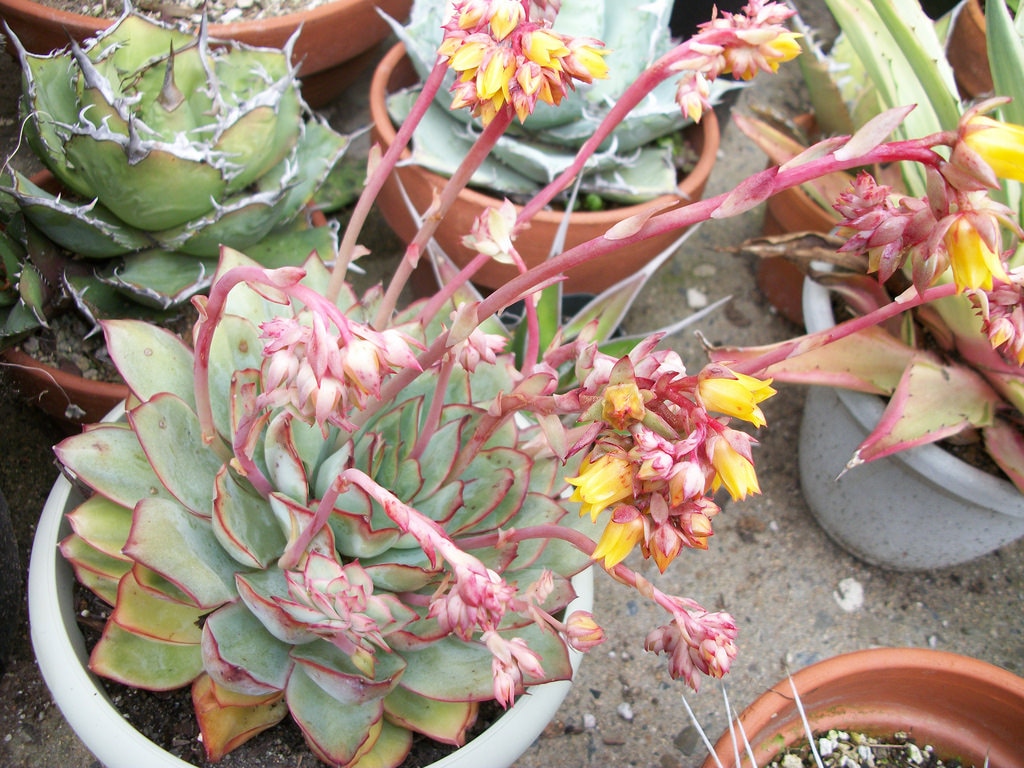
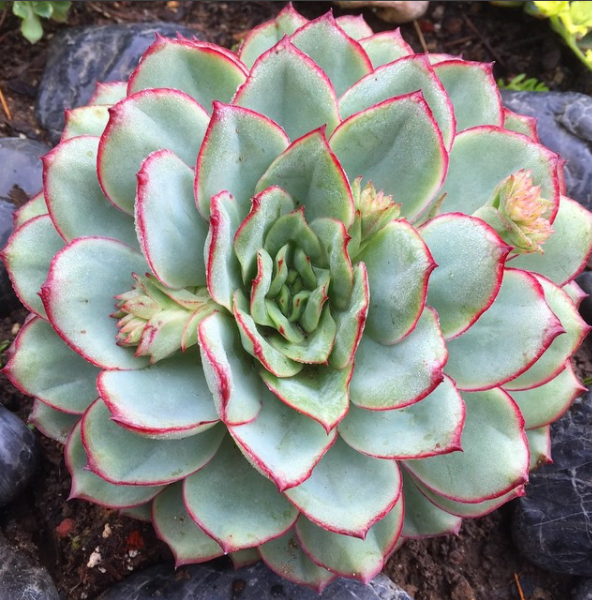
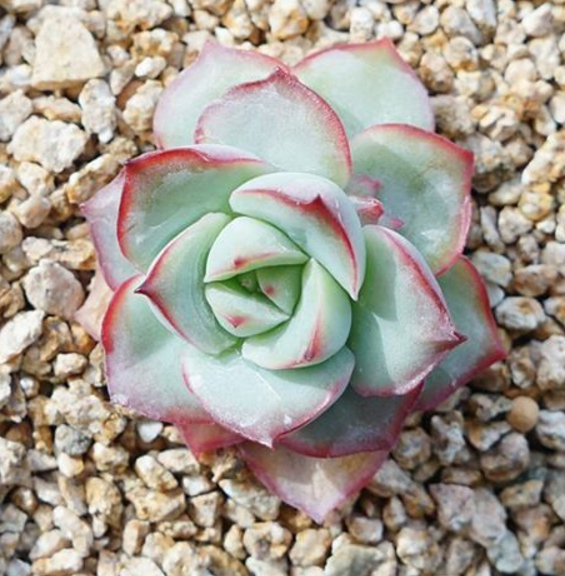
G. Fred Ives are actually prolific growers. I acquired my original Freddy from another succulent lover in the East Bay who had a succulent sale posting on craigslist. My sister and I drove out to her home to check out what she had for sale. While my sis walked away with 5 or 6 plants, I only brought home one plant -- my lovely G. Fred Ives. She was in a 1-gallon pot and had two heads. Since then, she has multiplied into over 20 new plants. I've propagating her from beheading and leaves. In my next post, I'll talk more about succulent propagation from leaves and offsets. Ever purchase a succulent because you liked how it looked but it was labeled "assorted succulents," "echeveria sp.," or didn't have a label? I do this all the time because I'm drawn to the succulents that are easy on the eyes but hard to identify. Part of the fun of having succulents with no name is doing the research to figure it out and catalogue it's care and growth. When it comes to succulent names, I'm typically interested in their "genus" and "species." Most of the succulents in my garden belong to the Crassulaceae family, though I do have some in the Asparagaceae and Asphodelaceae families. For instance, succulents that belong in the genus Echeveria are in the Crassulaceae family. I recently acquired a succulent with no name, though I knew it was an Echeveria.  See. Easy on the eyes. If you look closely, you'll notice a thin layer of powdery substance on her fleshy leaves, which is the succulent's farina. Some succulents generate farina as they develop new growth from the center of the rosette. Farina acts as a sunscreen protecting the plant from harsh rays and can typically be found on succulents that can withstand full sunshine. Watch out though, once you rub off the farina, the succulent will not regenerate new protection on leaves. So handle succulents with care. When I brought her home, she did not have a label. I can't even remember where I found her. So my search began. If a succulent has no name I will typically be on the lookout for succulents that look similar. A couple weeks later, I found a similar looking succulent named E. Pulidonis at a local nursery. Photo credit: Cactus Jungle | Flickr: Sonja010 | Unknown I was pretty convinced that she was a Pulidonis because the E. Pulidonis looked so similar. Upon further research, I was less convinced. Many of the descriptions I found on E. Pulidonis described "frosty blue leaves outlined with rose-red margins" or "red-edged pale bluish-green leaves" or "pale green rosettes with red edges." I initially thought my Echeveria's leaf margins would become redder with the sun, though I was wrong. The edges became pinker as days went by. Another method I've read about is waiting for your plant to bloom. So I waited. And waited. And waited some more. Finally, I found a bloom peeking through. As you can see in the photo below, the bloom is pink.  When I saw the pink bloom, I was certain that my Echeveria was not E. Pulidonis because E. Pulidonis has bell-shaped yellow blooms. 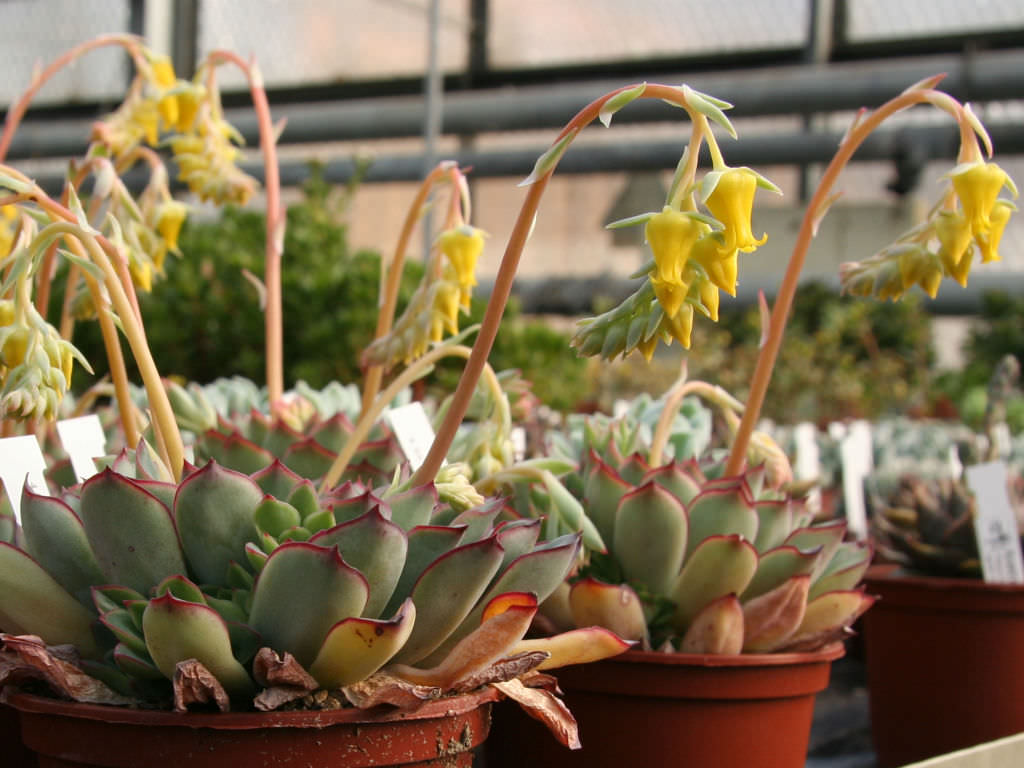 Photo credit: World of Succulents The search continued. While I haven't found anything in person that looked like my Echeveria, I saw some pictures that resemble my sweet little rosette. Pink margins - check. Pinkish blooms - check. I think we have a winner. Photo credit: Flickr walksimos | Flickr succulentville80 | IG @tyc333  The three pictures above are photos I found scrollin' through the interwebs and social media. Very similar to E. Pulidonis...because they are related. Pink margins and pink/yellow blooms are characteristics of a hybrid of E. Pulidonis x E. Derenbergii. I've also seen it named "E. Moon Goddess," though it's not a legitimate name. E. Moon Goddess is the name you find in some South Korean nurseries. However, E. Moon Goddess has been dismissed as the California hybrid's name because another frilly echeveria hybrid has claimed the name. (Photo: Ascot Vale Garden Centre) Upon further research, I learned that Jaewoo Kim, of Sarang nursery in the Republic of Korea crossed E. Derenbergii x E. Pulidonis and E. Pulidonis x E. Derenbergii. These hybrids have been known as "Jeongya Keum" and "Californica Queen." Photo credit: E. Jeongya Keum - sakusakubisco | E. Californica Queen - IG @hoonyhoho According to the International Crassulaceae Network, any plants with E. Pulidonis and E. Derenbergii as parent plants are considered E. Esther.
While this process took months to figure it out, I'm sure I could still be wrong. I'm going to wait a bit longer to see the full bloom spike, but as of today, I'm on team E. Esther. While some succulent lovers don't care to know the plants' names, I believe it's the best way to research their needs in terms of care. If you ever find a succulent with no name, part of the journey and joy could be figuring it out. Happy naming! In Fall 2016, I fell in love with variegated succulents. Variegated means that the succulent's foliage has multiple colors. The colors can be in a pattern or within the margins of the plant. For instance, my Aeonium Sunburst sports green leaves with yellow margins thinly lined with pink. Isn't she lovely?  I was drawn to variegated succulents because I imagined they could possibly bridge multiple colors together and would look amazing in arrangements. They are simply stunning. Whenever I learn about a new type of succulent, I enjoy researching and learning about the origins and needs of the plants. Despite succulents having the similar ability to store water in their plant parts, they all require a different type of care. This research led me to the coveted Echeveria Compton Carousel.  Coincidentally, E. Compton Carousel appeared on my IG feed in early November and I entered @fairyblooms Compton giveaway. Unfortunately, I did not win but I knew they were available online and they weren't cheap. I decided against purchasing succulents online because I wanted to see if they were available near me and I wasn't sure how they would do in the mail. They remained on my wish list. Excited to learn more about the E. Compton, I came across various names that have been used to sell/describe the plant. She was first found in Lenore Dean's garden in Sonoma, CA and is often times referred to E. Lenore Dean or E. Serenity. She has also been sold as E. Imbricata Variegata, though some claim this is an illegitimate name. I use "E. Compton Carousel" because that's what seems to be the most popular. I was eager to join the Compton Carousel Club. When I visited my local nursery, to my surprise, there were three for sale. They cost less than those I found online, though I still couldn't get myself to purchase them so impulsively. I waited. I think patience is the most important thing that gardening has taught me. And as you can see by these photos, these E. Comptons were not perfect. Many of the leaves were primarily cream, which means they would depend on the blue-gray parts for photosynthesis.  After about a day or two, my partner convinced me to get one as an early Christmas present. I was thrilled. When I asked about care instructions, the nursery owner said they get watered about once a week. I figured that as long as I followed these instructions, they would thrive. The nursery kept them outside and even planted some in the ground. 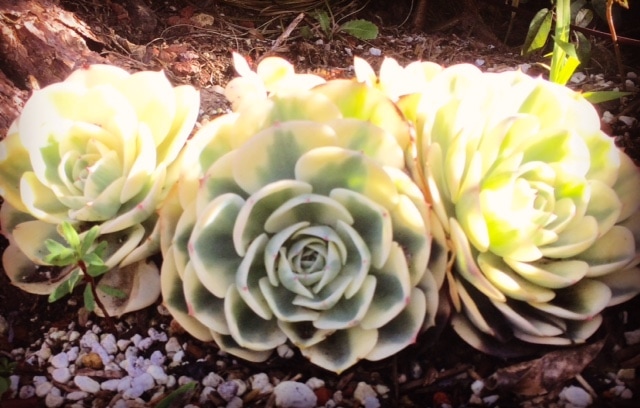 If they survived in the elements at the nursery, they would surely survive in my balcony. The following week, I was away for the holiday. I truly missed my Compton and was anxious to get back. I knew it had been raining and I wanted to be sure they didn't drown while I was away. Luckily, I had them underneath a planter, so they stayed dry. I watered my coveted Compton upon my return.  A couple weeks went by and I noticed the inner leaves were slightly brown. I took a closer look and to my dismay, the poor roots had rotted all the way through. I tried to save a piece of the stem, but that quickly dried and withered away the next day. I was so disappointed.  No piece was salvageable. My poor Compton literally fell apart in my hand. I was so distraught and knew I could not even think about replacing it anytime soon. I sadistically continued researching E. Compton Carousels because I needed to know where I went wrong. Was it the rain? the wind? the outside elements? Did I water too soon? Was it not getting enough sunlight? Compton Carousel Club members (not a real club, I made this name up but maybe we should start one) discussed E. Compton Carousel's sensitivity, with many members losing their first or at least one in their experience. This research actually made me feel better because I was in the same boat in terms of loss. After about a month, I visited my nursery again to find the E. Comptons gone. I asked the owner about selling his last two Comptons and he said they were stolen. Someone had stolen them along with a tray of other plants. Plantnapping! or Succulentnapping! Who would do such a thing? It was upsetting to hear that they were stolen. As soon as I got home, I searched online succulent shops and they were all sold out. I really believed I lost my chance to find another E. Compton Carousel. They were on sale on eBay and Etsy for three times the amount that I paid and I just couldn't trust and afford to purchase them online. Finally, I learned about the Succulent Marketplace and I'm so glad I did. Basically, SM allows independent sellers to post and sell their goods on a first come, first serve basis. A birdie told me that I might be able to find an E. Compton Carousel here. I patiently waited and sure enough, one seller came through. I was so pleased with the experience of purchasing on SM.  My package containing my new E. Comptons arrived last week. I have to say that plant mail is the best mail! Each rosette was wrapped, bare root in tissue and cushioned with shredded newspaper. They arrived in healthy condition and were well rooted. I think the issue with my first E. Compton Carousel was that her roots were limited. My new additions have a healthy root structure and thick, healthy leaves. When they arrived, I potted them in 50% cactus & succulent soil and 50% pumice. I also topdressed the pot with pumice.
This time around I sought more advice from experienced E. Compton Carousel moms. One mom in particular, Jackie, shared her methods and suggested that I wait until Spring for my first watering session. She currently has 8 Comptons in her greenhouse and has had them for about a year. I value her expertise and have decided to keep my Comptons inside for now, since its been raining for days/weeks/months it seems. My other succulents seem to be loving the rain and have great drainage so I've left them on the balcony. With my previous Compton experience, I'm hesitant to leave them outside and I trust Jackie's advice about watering. I also purchased grow lights so that my indoor succulents have access to enough light. It's been a week as a new member of the Compton Carousel Club and I am loving it! My Comptons bring me so much joy and I look forward to updating you all on the journey. In a future post, I'll share more about my grow light situation and my plans for the spring. After many suggestions to begin a blog from friends and family, here I am. I've gotten to the point where I can't remember every succulent I have in my balcony garden so I've decided to begin this blog to catalogue and remember what's in my garden and what I'm learning throughout this gardening experience.  Recently, my best friend told me that I'm like a plant lady (substitute cat for plant). I embrace this label because gardening and succulents have brought me so much joy in the past couple of years. This past weekend I was asked how I got into succulents. I responded that my journey began when I was young. I always remember being in the garden with my grandmother (or lola in Tagalog). My lola and my family grew various flora, vegetables, and fruits in our garden (zone 9b). I was greeted by crassula ovata (jade plant) as I approached our front door and my mother used aloe vera to condition my hair and soothe my sunburns. At the time, I didn't know they were succulents, nor did I have an interest in growing them. When I made my big move from Southern California to the San Francisco Bay Area (zone 10a) in 2006, I attended a wedding shower and came home with a 2-3 inch bamboo plant, Dracaena braunii as a party favor. Since then, I've watered, propagated, and cared for my braunii and it has grown from a couple inches to 3 feet tall! 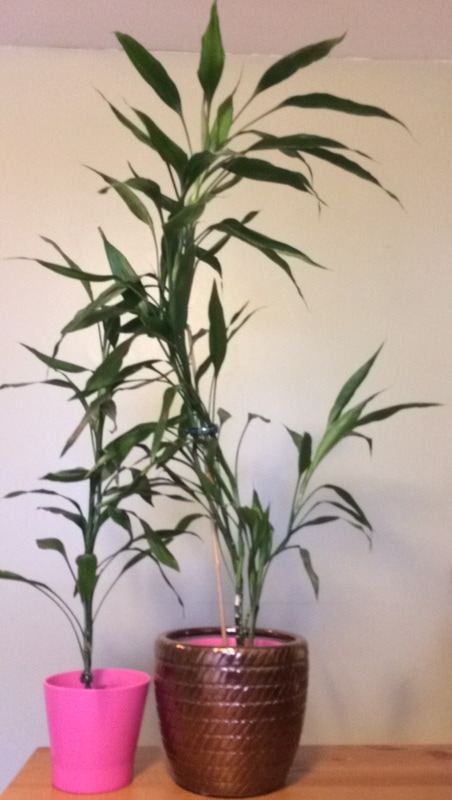 Dracaena braunii, February 2017 It's not a succulent, but it is the oldest plant in my home. So I must pay homage. Since then, I've cared for and killed plants without much documentation so here I am today -- attempting to bring you along on this journey. While this blog is mainly for me and my future memory, I hope that it can be educational as well. When I first moved to the East Bay in 2011, I brought a crassula ovata cutting home from my mother's garden. The poor thing did not travel well and I was left with a leaf to propagate. 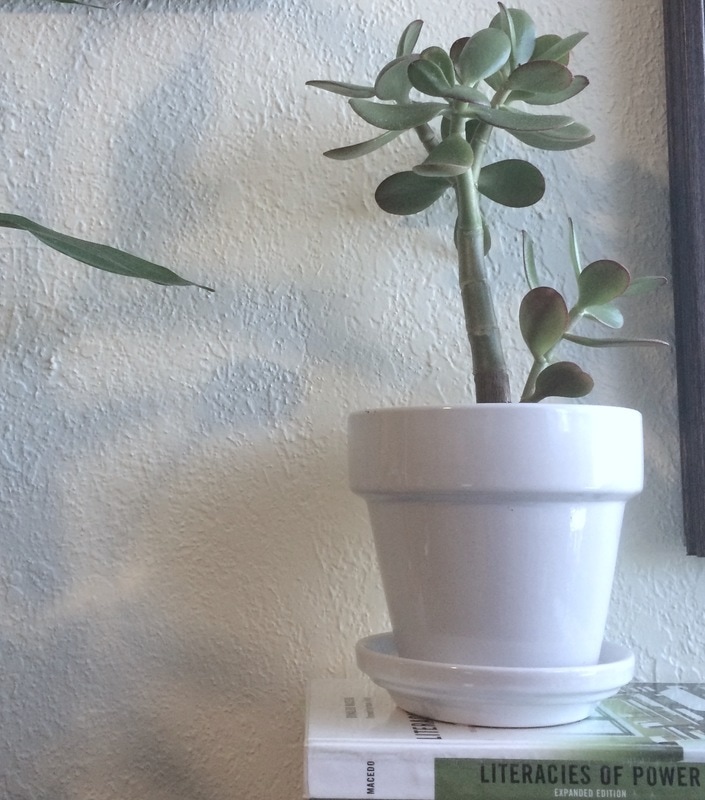 Crassula Ovata, August 2015 It lived in my east facing kitchen window and grew to be about almost a foot tall before I accidentally over-watered it in 2016, which caused it to rot and die. So let me just say, not all succulents will survive. I think I watered it twice in one week without realizing that it was still moist. When it comes to watering succulents, they prefer to dry out between waterings (more on succulent care tips in another post).
With more than 5 years experience caring for succulents, I look forward to sharing my knowledge, heartbreaks, lessons, and joy through sacra succulents. |
AuthorHello! I'm Jocyl, a succulent enthusiast living in California (zone 9b). I've been around succulents all my life and I look forward to sharing my succulent journey with you. 
ArchivesCategories
All
Instafeed |

 RSS Feed
